guides
Home Espresso Setup Guide: Dial In Your First Great Shot
Step-by-step guide to dialing in espresso at home: grind size, dose, yield, timing, brew temp. Common mistakes and how to fix them.
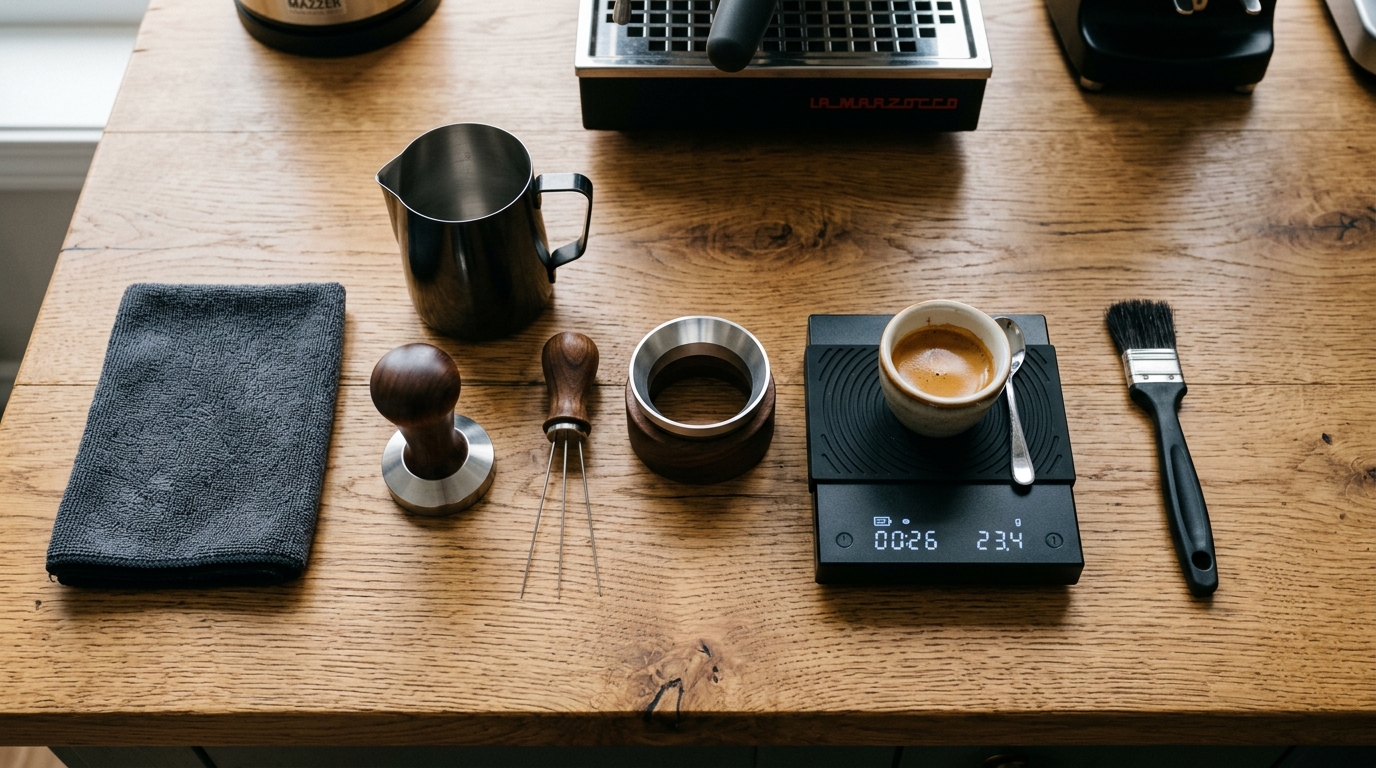
You’ve bought the machine and grinder. Now you have to make actual espresso, which is where most new home baristas get stuck for 2-4 weeks before the shots stop tasting like dishwater. The good news: the rules of dial-in are simple, the variables are limited, and once you’ve nailed it, you don’t think about it again until you change beans. This guide walks through the actual dial-in process plus the troubleshooting matrix that fixes 90% of bad shots.
The variables that matter
There are exactly five variables in espresso, and you can only realistically adjust two of them shot-to-shot:
- Dose (g of dry coffee in the portafilter) — adjust once when you pick a basket size; then keep constant
- Yield (g of liquid espresso in the cup) — target 2× the dose for normal espresso (1:2 ratio)
- Time (seconds from pump start to shot stop) — target 25-30 seconds
- Grind size — the lever you adjust most often
- Brew temperature — set on your machine and rarely changed
The two you change shot-to-shot: grind size (to hit the time target) and occasionally dose (when changing roast level dramatically).
Step-by-step: pulling your first shot
1. Choose your dose
Look at the basket size of the portafilter. Common sizes:
- 14g basket (single shot, 1:2 ratio = 28g out)
- 18g basket (most common, “double” — 1:2 ratio = 36g out)
- 20g basket (larger double, common on prosumer machines)
If you’re new, stick with 18g. It’s the most-documented dose, fits most baskets, and produces standard 36g doubles.
2. Grind, distribute, tamp
- Grind ~18g of coffee into the portafilter (single-dose grinders feed in 18g exactly; hopper-fed grinders need a scale).
- Distribute the grounds evenly using a distribution tool (the WDT — Weiss Distribution Technique — with a needle tool is the standard) or by gently tapping the portafilter.
- Tamp with consistent, level pressure. The exact pressure matters less than levelness — 30 lbs of pressure is the canonical number; some baristas tamp lighter or heavier with no real impact.
3. Lock and pull
- Lock the portafilter into the group head.
- Place your cup on a scale, tare to zero, and start the shot.
- Time the shot from the moment the pump engages (or you press the lever).
4. Stop at target yield
For a 1:2 ratio with 18g in: stop at 36g out. The yield matters more than the time — stop when you hit 36g, regardless of whether you got there in 24 or 32 seconds.
5. Evaluate
Three things to check after the shot:
- Time — was it within 25-30 seconds for a 1:2 ratio?
- Taste — sour (under-extracted) or bitter (over-extracted) or balanced?
- Crema — thick golden brown (good), thin and pale (under-extracted), dark and burnt (over-extracted)?
The dial-in matrix
Use this table to adjust grind based on the shot result:
| Product | Best for | Rating | Notes | |
|---|---|---|---|---|
| Shot pulled in under 22s | Sour, watery, thin crema | — | Grind FINER. Try 1-2 clicks down. | — |
| Shot pulled in 22-28s | Good range — taste decides further | — | Sour: finer. Bitter: coarser. Balanced: keep grind, refine other variables. | — |
| Shot pulled in 28-35s | Acceptable range for darker roasts | — | Bitter: coarsen. Balanced: keep grind. | — |
| Shot pulled in over 35s | Bitter, harsh, often won't complete | — | Grind COARSER. Try 1-2 clicks up. | — |
| Shot won't pull at all (choke) | Pressure spikes, no flow | — | Grind MUCH coarser. Try 5+ clicks up. | — |
Brew temperature by roast
Your machine’s PID controls brew temperature. Adjust by roast level:
- Light roasts (Onyx, Sey, Heart): 203-205°F. Lighter roasts need more heat to extract sweetness without sourness.
- Medium roasts (most specialty coffee): 200-203°F. The standard middle.
- Dark roasts (Italian espresso blends, Lavazza, Illy): 195-200°F. Darker beans are more soluble; less heat prevents burning.
If your machine has no PID, you can’t adjust this — but you can compensate with grind size (finer for lighter roasts).
Most common mistakes
After hundreds of forum threads, the same five mistakes:
- Eyeballing yield instead of weighing. Espresso volume is misleading because crema volume varies. Always weigh the shot — a $20 jewelry scale is fine.
- Stale beans. Beans older than 4 weeks from roast date have lost the CO2 needed for proper extraction. Check the roast date on every bag.
- Inconsistent tamping. Uneven tamps cause channeling (water finds the path of least resistance through the puck). The fix is leveling, not harder pressure.
- Wrong basket size for the machine. Putting 18g of coffee in a 14g basket overfills it and causes channeling. Match dose to basket size.
- Adjusting grind by huge jumps. Stepless adjustment lets you fine-tune in fractions of a setting. Change 1-2 clicks at a time, not 10.
Troubleshooting flowchart
Use this when something tastes wrong:
- Sour or grapefruit-like → under-extraction. Grind finer, raise brew temp, or use fresher beans.
- Bitter, harsh, ashy → over-extraction. Grind coarser, lower brew temp, or check that beans aren’t too dark/stale.
- Tastes like nothing / watery → underdosed OR coffee too coarse. Verify dose with a scale, grind finer.
- Channeling visible (one fast stream while others stutter) → uneven puck preparation. Improve distribution (WDT), tamp more level.
- No crema → beans too old (8+ weeks off roast), wrong roast level (light roasts can produce thin crema), or pressure issue (machine not hitting 9 bar).
- Burnt taste → brew temp too high, beans too dark, or shot pulled too long.
Equipment that helps
A few accessories meaningfully improve dial-in:
Best for every home barista — non-optional
Coffee Scale (with timer, 0.1g resolution)
A scale with built-in timer is the single most-important non-machine accessory. Tare the cup, hit start, pull until you hit your target yield. The Acaia Lunar is the cafe standard at \$250; the Timemore Black Mirror Basic at \$60 is the value pick that does 90% of what the Acaia does. A \$20 generic jewelry scale plus a phone timer works in a pinch.
★★★★★ (4,100 reviews)
Check current price on Amazon →Best for every home barista with a non-pressurized basket
WDT Distribution Tool (needle distributor)
The WDT (Weiss Distribution Technique) tool is a set of fine needles in a holder. You insert them into the ground coffee and stir gently to break up clumps and distribute evenly before tamping. \$15-30 for a decent one; the improvement in shot consistency is genuine and immediate.
★★★★★ (3,200 reviews)
Check current price on Amazon →FAQ
Frequently asked questions
How long does dial-in take when I get new beans?
What's a "double shot" exactly?
Should I use pressurized or non-pressurized baskets?
Why is my crema disappearing so fast?
How often should I clean my machine?
When should I update my grind setting?
Bottom line
Target 18g in, 36g out, 25-30 seconds. Use a scale. Time every shot. Adjust grind based on extraction time, not vibes. Replace stale beans before troubleshooting equipment. Within 2-3 weeks of regular practice, dial-in becomes a 30-second pre-shot ritual instead of a problem.
For the equipment side: machine picks, grinder picks, or the pillar setup overview.