guides
How to Clean a Steam Wand
Step-by-step guide to cleaning your espresso machine steam wand — after every use, daily, and deep cleaning when buildup blocks steam flow.
 Elena Marchetti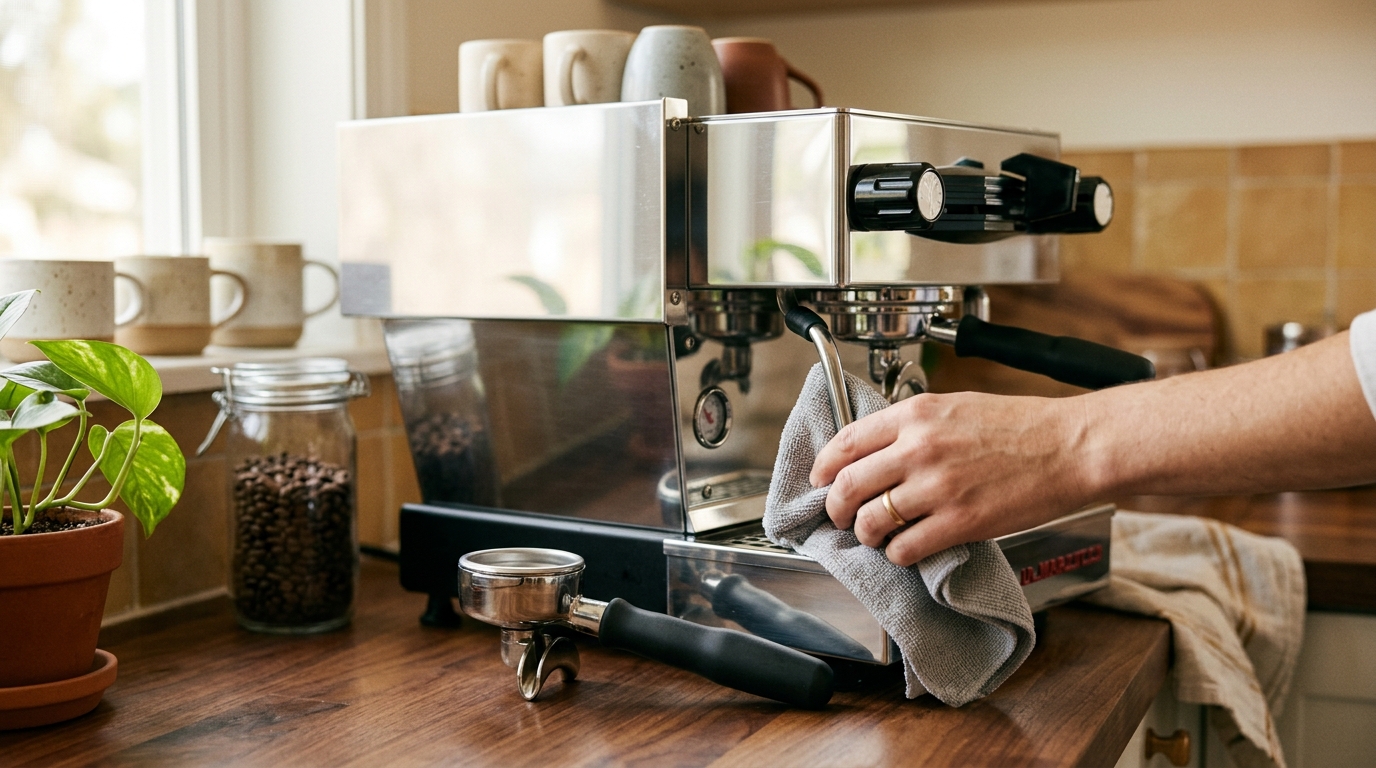
Purge the steam wand for two seconds immediately after every use, then wipe with a damp cloth before the milk residue dries. Weekly, soak the removable tip in a diluted milk cleaner solution for 15 minutes. A clogged tip clears in under five minutes with a sewing pin and a short soak in hot water with cleaner.
Why steam wand cleaning matters
Milk is the reason steam wand maintenance is non-negotiable. Unlike coffee residue, which oxidizes gradually, milk proteins and fats adhere to the wand and to the inside of the steam tip almost instantly when exposed to heat. Within minutes of steaming, residue on an uncleaned wand begins to bake onto the metal surface. Within hours, it forms a hard mineral-protein layer that narrows the steam holes and changes the way steam exits the tip.
A partially blocked steam tip does not distribute steam evenly across the milk. Instead of the even swirling vortex that creates fine, glossy microfoam, a dirty tip produces jets of steam at uneven angles. The result is grainy, coarser foam with large bubbles — unusable for latte art and unpleasant in a flat white or cappuccino.
Beyond foam quality, a neglected steam wand becomes a hygiene issue. Milk is a growth medium for bacteria. Dried milk residue sitting at the tip and inside the steam tube between sessions is exactly the environment where bacteria multiply. Regular cleaning is not just about performance — it is about food safety.
There is also a mechanical issue. Severe buildup inside the steam tip or the wand tube can create enough back-pressure that steam flow becomes inconsistent. The machine still produces steam, but it pulses, spits, or struggles to reach temperature. Prevention through daily and weekly cleaning is far easier than a service call.
What you need to clean a steam wand
- Damp cloth or dedicated steam wand rag — keep one folded next to the machine at all times. A microfiber cloth is ideal because it does not shed threads into the steam tip. Do not use the same cloth you use to wipe the drip tray.
- Milk frother cleaner (Urnex Rinza or equivalent) — an alkaline liquid cleaner formulated specifically to break down milk proteins and fats. This is the correct tool for soaking the tip; espresso machine backflush tablets are formulated for coffee oils, not milk, and are less effective on steam wand residue.
- Small container or shot glass — for soaking the steam tip during weekly cleaning.
- Sewing pin or steam tip cleaning pin — a simple sewing pin clears blocked steam holes. Many machines include a small pin tool in the accessory kit. A straightened paperclip works in a pinch, though its larger diameter can scratch precision-machined tip holes on some machines.
- Steam wand brush — a narrow cylindrical brush that fits inside the steam tube above the tip. Useful for monthly deep cleaning of the internal tube, which a pin and a soak cannot fully address.
Best for weekly steam tip soaks and milk residue removal
Urnex Rinza Milk Frother Cleaner
Rinza is an alkaline liquid formulated to dissolve milk proteins and fats — the compounds that block steam tips and build up inside the steam tube. Dilute one capful in a small cup of hot water and soak the tip for 15 minutes. It outperforms backflush tablets for milk-specific buildup and is safe on all metal wand tips. A 250ml bottle handles 25-30 cleaning cycles for around $10.
★★★★★ 4.8 · 3,400 reviews
Check current price on Amazon→Best for monthly internal steam tube cleaning on semi-auto machines
Urnex Cafiza Espresso Machine Cleaner
While Rinza handles milk residue at the tip, a monthly soak of the steam wand tube with a diluted Cafiza solution breaks down mineral deposits that enter from steam condensation. Use 1g per 100ml of hot water, insert the tube into the solution, and run a brief burst of steam through the cleaner. Rinse with three steam purges into fresh water after. One 566g container lasts years of home use.
★★★★★ 4.9 · 12,500 reviews
Check current price on Amazon→Step 1: After every use — purge and wipe (30 seconds)
This is the single most important steam wand habit. Do it immediately after steaming, before you take your first sip.
- Open the steam valve for 2 seconds to purge any milk that has been drawn back into the tip during steaming. The purge blasts steam through the tip holes and forces out any milk inside the tip before it dries. Hold a damp cloth loosely around the wand while purging — the cloth catches the expelled milk without splashing.
- Wipe the full length of the wand immediately with the damp cloth. Use firm pressure and run the cloth from the body of the wand down to the tip. The wand is still hot, and milk wipes off with almost no effort at this stage.
- Run a cup of clean water under the tip and briefly open the steam valve again for 1-2 seconds. This final rinse pushes water through the tip holes and prevents any residual milk from drying inside the orifices.
- Inspect the tip visually. Under good light, you should see clean, unobstructed holes. If any look partially blocked, address them now with a pin rather than waiting for the next session.
The entire sequence takes 30 seconds. Skipping it once is rarely catastrophic. Skipping it consistently means the tip becomes blocked within a week and the next cleaning step becomes necessary far sooner.
Step 2: Daily rinse — steam into a cup of water
If your machine is used every day, add a brief steam-into-water cycle as part of the startup routine.
- At startup, before your first session, hold the steam wand over a small cup of cold water and open the valve fully. Let the wand steam into the water for 3-4 seconds after it reaches full pressure.
- Inspect and wipe. Any residue displaced from the tip shows up in the water cup. Wipe the tip and external wand surface with the damp cloth.
- On machines with removable tips, check the condition of the internal threads once a week. Milk buildup in the threads forces the tip to seat off-center, which affects steam distribution even after cleaning.
This step adds minimal time and keeps the tip flowing cleanly between weekly soaks.
Step 3: Weekly tip soak — 15 minutes
Once a week, remove the steam tip and soak it in a diluted Rinza solution. This dissolves the protein and fat layer that daily purging and wiping cannot fully remove.
- Remove the steam tip by unscrewing counterclockwise. Most tips unscrew by hand or with a small wrench. If a tip has not been removed in months, mineral buildup in the threads may make it tight — use a silicone grip pad for better purchase, not pliers, which can damage the tip body.
- Prepare the soak solution. Add one capful of Urnex Rinza (approximately 10ml) to 150ml of hot water in a small cup or shot glass. The solution should look slightly opaque.
- Submerge the tip fully in the solution and leave it for 15 minutes. For tips with severe buildup, extend to 30 minutes.
- Agitate occasionally. Swirl the cup or gently move the tip. This ensures the solution contacts the internal surfaces of the tip holes, not just the exterior.
- Rinse under running water and dry with a cloth. Use the pin to check that each hole in the tip is clear. If any remain partially blocked, run the pin through each hole briefly while the tip is still wet from the soak.
- Reinstall the tip and run a short steam purge into a cup of water to clear any remaining cleaner from the tip before your first milk session.
| Product | Best for | Rating | Notes | |
|---|---|---|---|---|
| Purge and wipe | After every steaming session | ★★★★★ | Prevents milk from drying inside the tip — the single highest-impact habit for wand longevity | — |
| Steam into water rinse | Daily startup routine | ★★★★☆ | Clears loose residue from inside the tip orifices; catches buildup the wipe alone cannot reach | — |
| Weekly Rinza soak | Weekly for regular home use | ★★★★★ | Dissolves milk protein and fat deposits from tip surfaces and internal channels | — |
| Internal tube brush | Monthly for high-volume users | ★★★☆☆ | Cleans the steam tube above the tip; most home users need this only a few times per year | — |
How to clear a blocked steam tip
A completely or partially blocked tip is fixable without professional help in most cases.
- Identify which holes are blocked. Open the steam valve briefly over a white cloth. Steam exits the clear holes but nothing comes from blocked ones. The asymmetric steam pattern is obvious on a light surface.
- Soak the tip for 30 minutes in a Rinza solution before attempting to pin the holes. Softening the buildup first makes the pin effective without forcing.
- Use a sewing pin, not a toothpick or a rough-ended paperclip. Insert the pin straight into each blocked hole and rotate gently. Do not lever the pin sideways — you can enlarge the hole and alter the steam angle permanently on precision machined tips.
- Rinse and retest. Steam briefly into a cup. If the hole remains blocked, soak for another 15 minutes and repeat. Multiple short cleaning cycles are safer than aggressive pinning.
- For tips with mineral scale, soak in a 50/50 solution of white vinegar and hot water for 20 minutes before the Rinza soak. Mineral scale is alkaline; the acidic vinegar soak dissolves it before Rinza addresses the protein layer. Rinse thoroughly between the vinegar and Rinza soaks.
If pinning and repeated soaking fail to clear a hole, the tip may be damaged or have a manufacturing defect. Replacement tips are inexpensive — most cost under $10 and are specific to the machine model.
Cleaning different steam wand types
Single-hole tips
Single-hole tips are common on older and budget machines. They clog faster than multi-hole tips because all steam exits through one point. The daily purge-and-wipe routine is critical. A single blocked hole means no steam output at all, so clear blockages immediately.
Multi-hole tips (3-hole, 4-hole)
Multi-hole tips on modern semi-auto machines produce finer microfoam but have more orifices to maintain. Weekly soaking is especially important because milk can partially block individual holes without eliminating steam flow entirely — the tip continues working but with a distorted steam pattern that degrades foam quality subtly.
Panarello wands
Panarello wands have an outer sleeve that introduces air into the steam stream automatically. The sleeve must be removed weekly for cleaning — milk collects in the gap between the inner tube and the outer sleeve and is invisible until it causes problems. Remove the sleeve by pulling it straight off (it usually clips on), soak it in Rinza separately, and clean the inner wand tip as you would any standard tip.
Prosumer and commercial-style wands
Professional steam wands on prosumer machines like the Breville Dual Boiler, Rocket Appartamento, or ECM Synchronika have longer, articulated wands with precision tips. These benefit from the same purge-and-wipe routine but tolerate steam-into-water rinses exceptionally well given their higher boiler pressure. Weekly tip removal and Rinza soaks should be standard practice at this level.
Common mistakes to avoid
Wiping after the milk has dried. If you wait even five minutes, milk begins to dry onto the metal. A dried wand requires more force to clean, risks scratching the tip finish, and leaves residue in the tip holes that a single wipe cannot remove. Always purge and wipe while the wand is still at steaming temperature.
Using abrasive cleaners or steel wool. The steam wand exterior and tips are stainless steel, but some machines have chrome-plated wands. Abrasive pads scratch both finishes and create rough surface texture that milk residue adheres to more readily. Use a soft cloth only.
Over-tightening the tip after soaking. A tip soaked in water expands slightly. Reinstall it hand-tight, then a quarter-turn further. Over-tightening can strip the threads or crack a thin tip body on some machines.
Skipping the post-clean steam purge. Always run a short steam purge into a cup of water after reinstalling a tip that has been soaked in cleaner. Residual Rinza or Cafiza will flavor any milk steamed without this purge. Two seconds of steam through a cup of fresh water is sufficient to clear cleaner residue from the orifices.
Allowing milk to enter the steam tube. This happens when you dip the steam wand too deeply into the milk pitcher — the milk level rises above the tip and is drawn back into the wand by vacuum when the valve closes. Keep the tip just below the milk surface during steaming. If you suspect milk has entered the tube, do a longer-than-normal steam purge into water immediately.
FAQ
Frequently asked questions
How often should I clean my steam wand?
What is the best cleaner for a steam wand?
How do I unblock a steam wand tip?
Can I put my steam wand tip in the dishwasher?
My steam wand is spitting water — what is wrong?
How do I clean a Breville steam wand?
Bottom line
Steam wand cleaning requires four habits: a 30-second purge-and-wipe after every use, a daily steam-into-water rinse, a weekly tip soak in Urnex Rinza, and a pin-clear for any blocked holes before they worsen. Maintain that schedule and the wand produces consistent, fine microfoam every session. Skip it for a week and the tip blocks, foam quality degrades, and a five-minute fix becomes a thirty-minute project.
For more: how to clean an espresso machine, how to froth milk at home, best espresso cleaning kits, and best espresso machine cleaning tablets.